Saturday 28 December 2013

Steamed Pears In Honey

Steamed Pears In Honey


Recipe source :  "Regional Chinese Cooking" cook book


When I saw this recipe in "Regional Chinese Cooking" cook book, I  thought back to  pears in red wine.  I wanted to try out this recipe as well as I wanted to know whether pears stewed in brandy and honey will be as good as pears in red wine. This version is not spicy at all since no spices are involved. Obviously, this is milder than pears in red wine but that does not mean it is less tasty. Each has its own flavour. 

If you like liquor, you will like this. 

Ingredients


4 pears
4 tbsp sugar
2 tbsp honey
3 tbsp brandy    ( or any liquor of your choice )


Instructions


1.  Peel pears, leaving the stalks.
2.  Stand pears in a saucepan and add some water, to just cover.
3.  Simmer for 30 minutes.
4.  Pour away half of the water. Then sprinkle sugar and simmer for another 5 minutes.
5.  Add honey and liquor to the reserved liquid and stir well.
6.  Refrigerate pears and honey-liquor liquid.
7.  To serve, place pears in individual dessert bowls and pour some honey-liquor over it.


I am linking this post to Cook-Your-Books # 7

  photo 77951578-1914-4b72-8eda-9e40a91183ac_zps331eb4b4.jpg

Hosted by Joyce of Kitchen Flavours

Wednesday 25 December 2013

Ginger, Egg & Wine Soup 姜酒汤

Ginger, Egg & Wine Soup 姜酒汤


Recipe source :  Doris Choo

My friend, Sharon was telling me about her mother visiting her during the school holidays and how happy and blessed she felt when her mother cooked all her favourite dishes. One of the dishes she mentioned was this ginger, egg and wine soup. The way she described the taste and how cosy she felt after eating and drinking this soup really set off my salivary glands working overtime. Her description and enthusiasm was infectious!

I decided to cook this since I've got a bottle of raisin wine lying idle at home. It wasn't difficult because my mother used to cook this for me during my own confinement. I just had to rack my brains for the recipe. But of course, if you are cooking for confinement ladies, you must add in lots more ginger and wine than the amount that I mentioned below. I remember my mother used ginger shreds to fry the beaten eggs in addition to the ginger she used to cook the soup. Oh, it was very delicious! I fully understood Sharon's enthusiasm over this dish. 

Even this milder version I am sharing now,  really kept me warm and cosy after dinner.

Ingredients


250g pork slices, mix with 1 tsp of flour
20g dried black fungus, soaked and cut into thin strips
20g ginger, cut into thin strips
3 tbsp glutinous rice wine or raisin wine
500ml chicken stock 
3/4 tsp salt
2 eggs, beaten
2 tbsp cooking oil


Method


1.  Heat wok, add 1 tbsp cooking oil and fry beaten eggs to make an omelet. Remove and cut into wedges.
2. Add the remaining 1 tbsp cooking oil into the wok. Saute the shredded ginger strips until golden.
3. Add in the pork slices and stir-fry for one minute or until the pork turns whitish.
4. Add in the shredded black fungus strips and continue to fry for another minute.
5. Pour in the stock and bring it to a boil.
6.  Add in omelette wedges.
7.  Add in wine and switch off the fire. Stir to mix evenly.
8.  Pour into a large soup bowl.
9.  Serve hot.


Saturday 21 December 2013

A Beautiful Bloom 开花鸡蛋糕

A Beautiful Bloom 开花鸡蛋糕


Recipe source :  Adapted from Y3K Issue 40 1/2 2008

"Fatt Koe" or "Huat Kueh" is a heritage food. Both words in the Cantonese dialect as well as the Hokkien dialect connote to increasing abundance of wealth. The rising of the cake which causes the bun to break or "smile" is a symbolic gesture of prosperity and good wishes. Hence, this bun is a festive food traditionally offered on the Chinese alter table with the hope of bringing good tidings and wealth!

I prepared this and Tang Yuan (Glutinous Rice Balls) in conjunction with the celebration of  Winter Solstice or 冬节

Ingredients A


6 chilled eggs
180g castor sugar
2/3 tsp spoon cake improver   ( I did not use this)


Ingredients B


260g superfine flour
2/3 tsp double action baking powder


Ingredients C


50ml 7-Up or aerated water


Ingredients D

1 tbsp castor sugar


Utensils and Materials


1 big sheet of grease-proof paper
7 inch mould
red colouring


Method


1.  Fill a steamer with water and pandan (screw-pine) leaves.
2.  Beat ingredients A until white and thick consistency.
3.  Pour No. 2 into a big bowl and add in ingredients B in small batches and fold.
4.  Add in ingredient C and mix to a thick batter.
5.  Line a mould with grease-proof paper. Leave extra paper surrounding the mould.
6.  Pour in No. 4. Use a spoon to dust ingredient D on surface to form the word 人.
7.  Wipe the steamer cover dry. Place the mould and batter into the steamer.
8.   Steam over high heat for 30 to 35 minutes. 
9.  Insert a skewer to check whether it is thoroughly cooked. There should be no batter bits clinging to the skewer if it is.
10. Print some red food colouring to form designs. 
11. Trim off the excess grease-proof paper.

 
The smiling and blooming bun denotes increasing prosperity and good tidings!


Tang Yuan (Glutinous Rice Balls) 汤圆

Tang Yuan (Glutinous Rice Balls) 汤圆

Recipe source :  Doris Choo

Today is an auspicious day, Chinese across the globe are making tang yuan or glutinous rice balls to celebrate 冬节 or Winter Solstice. Many believe the Winter Solstice or 冬节 is much more auspicious and important than the Lunar Chinese New Year. 

The traditional tang yuan is cooked in ginger syrup without filling. Over the years, creativity set in and the original version of plain tang yuan had evolved into balls of glutinous rice stuffed with all kinds of tasty fillings. The more common and popular fillings being red bean paste, yam paste, sesame paste and peanuts. 

With or without the fillings, tang yuan tastes great in the ginger infused syrup. It is a great dessert, usually taken hot or warm.

When we were young, our elders used to tell us that we have to eat the same numbers of tang yuan equivalent to our age. Back then our young minds would be thinking "oh my gosh! grandpa would have to eat seventy tang yuan!"  However, we caught on fast and pretty soon we knew grandpa was just pulling our legs! According to the Chinese method of calculating age, the moment you eat tang yuan on that particular day, you would have just added one year to your age.

Like most Chinese, we are celebrating this auspicious day and I am happy to share our family's  version of the tang yuan.


Ingredients for White Tang Yuan


80g glutinous rice flour
80ml hot boiling water ( add more if necessary to form a soft dough)
100g red bean paste ( divide into 10 balls )

Method


1.  Place the glutinous rice flour into a large bowl. 
2.  Add hot boiling water to the flour and use a spoon to mix he flour and water.  When it has cool down sufficiently to handle, use hands to knead this mixture to form a soft dough.
3.  Add more hot water if the flour cannot bind.
4.  Or add more glutinous rice flour if the dough is too sticky to handle.
5.  Divide the dough into 10 equal portions.
6.  Roll each portion into a small disk and wrap the dough round a ball of red bean paste to form a white ball.
7.  Repeat the process with the remaining ingredients. 
8.  Set aside the white tang yuan.

Ingredients for Red Tang Yuan


80g glutinous rice flour
80ml hot boiling water ( add more if necessary to form a soft dough)
2 to 3 drops red food colouring
100g red bean paste ( divide into 10 balls )
 

Method


1.  Place the glutinous rice flour into a large bowl. 
2.  Add red food colouring into the boiling water. Then add the hot boiling water to the flour and use a spoon to mix the flour and water.  When it has cool down sufficiently to handle, use hands to knead this mixture to form a soft dough.
3.  Add more hot water if the flour cannot bind.
4.  Or add more glutinous rice flour if the dough is too sticky to handle.
5.  Divide the dough into 10 equal portions.
6.  Roll each portion into a small disk and wrap the dough round a ball of red bean paste to form a pink ball.
7.  Repeat process with the remaining ingredients.
8.  Set aside the pink tang yuan.


 Before boiling in hot water

Ingredients for the syrup 


20g ginger, smacked with the back of a cleaver
750ml water
120g rock sugar

1.  Bring all the ingredients to a boil until the rock sugar dissolves.
2.  Set  aside and keep warm..  

Cooking the Tang Yuan


1.  Bring a large pot of water to a boil. 
2.  When boiling, add balls of white tang yuan and red tang yuan into the boiling water.
3.  The tang yuan will float to the surface once it is cooked.
4.  Use a slotted spoon to remove the cooked tang yuan and place into bowls.
5.  Add syrup to the bowls of tang yuan.
6.  Serve hot.


Wednesday 18 December 2013

Chicken Machboos (Bahraini Spiced Chicken and Rice)

Chicken Machboos (Bahraini Spiced Chicken and Rice)


Recipe source :  Adapted from The Daring Gourmet

This chicken machboos is very  similar to our local "Nasi Briyani". It is so ironic that I have not  cooked our local "Nasi Briyani" all these years,  yet I am now cooking a Bahraini spiced chicken and rice!. Unbelievable!

I modified the cooking style by taking the short cut and cooked this very fragrant and savoury rice in an electric rice cooker.  This is because I have not cooked rice the conventional way for such a long time that I was worried that I might end up with a pot of burnt rice. It is better to be safe than sorry!

If you like spicy food, this is delicious! More or less like our local "Nasi Briyani".

Ingredients


1 large onion, diced
2 tbsp cooking oil
1 tbsp Baharat     (please refer to above link on how to prepare this Baharat)
1 tsp turmeric
2 whole chicken drumsticks  ( cut into 2 pieces each )
2 red chilli padi, sliced
1 tbsp fresh ginger, minced
5 cloves garlic, sliced
2  large tomatoes
2-3 dried limes  (loomi)       ( I omitted this )
5 cardamon pods
2 cloves
1 stick cinnamon ( about 2 inches long )
1 1/2 tsp salt
2 cups chicken stock
250g rice
2 stalks fresh cilantro, chopped


Top left : turmeric powder. Top middle: cardamon pods. Top right : cloves
Bottom left : cinnamon bark. Bottom right : red chillies

Top left : tomatoes
Middle left : ginger.
Centre : garlic 
Bottom left :  large onion
Far right : cilantro

Instructions


1.  Heat oil in a wok and brown the chicken pieces. Remove and set aside.
2.  Using the remaining oil in the wok, fry the diced onions until brownish.
3.  Add in minced ginger, sliced garlic and red chillies.
4.  Add in the Baharat and turmeric and cook for another minute.
5.  Switch off the flame and remove contents of the wok into a rice cooker.
6.  Add in the washed rice and chicken pieces together with water.
7.  Add in tomatoes and cilantro.
8.  Add in cardamon pods, cloves and cinnamon bark to the rice-cooker
9.  Add in salt and stir to mix well.
10.  Switch on the rice-cooker and let it auto-cook until done.
11.  Once the indicator shows "done", fluff up the rice and scoop out the rice to a serving plate and arrange the chicken pieces around the rice.


I am submitting this post to Asian Food Fest : West Asia 


Saturday 14 December 2013

Snowman Bun (dumpling)

Snowman Bun (dumpling)


Recipe source : Doris Choo


When I was young, I used to join in the Christmas revelry because one my friends, HS, was the grand daughter of a family which built and managed the only church in town. I used to joined her and other church members when they went Christmas carolling. I, too, joined in the fun and festivities when she and her family decorated their Christmas tree. Thinking of this brought back happy memories of my childhood and Christmas! Well, those were the days!

"Christmas" brings images of Santa Claus, reindeer, pine trees, the colours red and green, mistletoe, white snow, snowflakes and of course, the inevitable snowman! I remember seeing a picture of "snowman buns" somewhere. It was cute and like I said, somehow the snowman brings me connotations of Christmas cheer!

So, wanting to join in the Christmas festivity, I set out to make some snowman buns today. 

Here is my humble attempt at making snowman buns.

Ingredients for basic bun - makes 15 buns


500g pau flour
11g instant yeast
100g sugar
50g corn oil
250ml water ( add more if necessary )
2 3/4  tsp double action baking powder


Other ingredients


500g red bean paste
red food colouring
pieces of carrot for the snowman's nose (The carrot is to be stuck to the nose area when the buns are ready and is for decorative purposes only)
black beans ( for snowman's eyes. An alternative is to use red bean paste to make the eyes )
plain flour dough, stained pink for the snowman's scarf (The scarf is to be wrapped around the snowman's neck after the buns are ready and again is for decoration only)
15 pieces of grease-proof paper ( 12cm x 6 cm )


 Instructions


1.  Mix pau flour and yeast together.
2.  Dissolve sugar in the hot water.
3.  Mix all the ingredients in a large mixing bowl and knead dough with hands for 10 to 15            minutes or by electric mixer until it becomes smooth and extensible.
4.  Leave the dough in the bowl for about 1 hour to allow the dough to develop and rise. 
5.  Cover the bowl with cling film or a towel.
6.  After an hour, punch down the dough and divide it into 15 portions of 40g each and another 15 portions of 20g each.  
7.  Divide the red bean paste into 15 portions of 10g each and another 15 portions of 30g each.
8.  The 40g dough is for the snowman's body while the 20g dough is for the snowman's head.
9.  Roll out the 40g dough and wrap 30g of red bean paste to form an oval shape for the snowman's body. 
10.  Roll out the 20g dough and wrap 10g red bean paste to form a ball for the snowman's head.
11.  Stick the two pieces of wrapped dough together and place onto a piece of grease-proof paper.
12. Repeat the process with the remaining dough.
13. Let it proof again for about 30 minutes. 
14. Place the buns into a steamer and steam for 15 minutes.
15. Decorate the steamed buns with eyes, nose, mouth and scarf to make the buns look like snowmen. 

The snowmen before steaming


I am submitting this to Baby Sumo's Christmas Recipes Collection 2013 event which is hosted by Baby Sumo of Eat Your Heart Out


Friday 13 December 2013

Chicken Drumsticks With Paprika & Garlic (Bill Granger)

Chicken Drumsticks With Paprika & Garlic (Bill Granger)


Recipe source :  Adapted from Bill Granger

Bill's chicken drumsticks with paprika and garlic is popular among my blogging friends. Many of them have already tried this dish. I could not resist not trying it out when they showcased photos which were so tempting and so irresistible!  

Here is my attempt and It is delicious!

Ingredients


3 whole chicken drumsticks
2 tbsp soy sauce
1 tbsp lime juice
3 cloves garlic, crushed
2 tsp cummin (jintan putih)
1 tsp paprika
1 tsp chilli powder
5cm piece ginger, grated


Place the marinated chicken drumsticks in a baking tray lined with aluminium foil

Instructions


1.  Using a sharp knife, make a few slashes 0.5cm deep through the thick parts of the chicken drumsticks.
2.  Combine all the spice ingredients in a small bowl and using hands to rub the spice marinade over the chicken drumsticks. Cover and transfer to fridge and let marinate overnight.
3.  Preheat oven at 200degree C.
4.  Place chicken in a baking tray lined with aluminium foil and roast the chicken drumsticks for 20 minutes.
5.  After 20 minutes, turn the chicken pieces and roast the other sides until slightly charred.


I am linking this post to"Cook Like A Star"


Tuesday 10 December 2013

Kuih Lapis 九层糕

Kuih Lapis 九层糕


Recipe source :  The Malaysian Cookbook....page 29


I made this kuih lapis to be offered among the foods which I have prepared as Thanksgiving at a Taoist temple. It is now fast approaching the end of the Chinese lunar calendar and it is time to offer prayers in gratitude for blessings from the deities for the entire year. 

This is my first attempt at making this kuih lapis which is a Malaysian delicacy using rice flour and coconut milk as the main ingredients. The santan or coconut milk and the pandan leaves made this kuih very fragrant.

The Chinese refer to it as 'nine-layered cake'. I love to eat this by peeling off layer by layer to savour the fragrance and its sweetness. 


Ingredients


185g rice flour
125g tapioca flour
450ml santan or coconut milk
1/4 tsp salt
drops of food colouring


Syrup ingredients


280g coarse sugar
150ml water
4 pandan leaves (screw-pine)
 

Method


1.  Sift the two types of flour together. Add santan gradually to the sifted flour. Blend into a smooth batter.
2.  Boil syrup ingredients over moderate heat till sugar dissolves. Strain the syrup and add hot water ( if necessary ) to bring it to 225ml. Pour hot syrup into the blended flour mixture.
3.  Reserve about 160ml of batter and add red colouring ( this is for the top most layer ).
4.  Divide the remaining batter into two portion, one white and one pink. (if you prefer to have more layers of different colours, then reserve a portion of about 160ml each to mix in the colour of your choice)
5.  Boil water in a steamer.
6.  Lightly grease a round cake tin ( 18cm diameter x 5 cm height  ).
7.  Place the cake tin in the steamer.
8.  Pour in a white layer of batter and steam for 4 to 7 minutes till cooked.
9.  Once the white layer is cooked, add in the pink layer and steam the same way.
10. Repeat the process with the batter, alternating the colours, layer by layer. 
11.  Use dark red for the top most final layer.
12.  Cool cake completely (preferably overnight ) before cutting.

Tip :  

Make sure each layer is thoroughly cooked before adding the next layer. The batter will  become opaque once it is cooked.


Friday 6 December 2013

Pears In Red Wine

Pears In Red Wine


Recipe source :  Ellice Handy Recipes ( Female Cookbook 1979 )


These pears in red wine are extremely delicious. My youngest son, YS and I like these pears very much. The cookbook recommended that we eat them with ice-cream. Ice-cream! This meant double bliss for both of us, to have chilled pears cooked in delicious red wine sauce topped-up  with ice-cream for dessert! This is definitely a treat , not an everyday treat!

We love the unique flavour of the stewed pears cooked with cloves, cinnamon and red wine. 

Yes, a very delicious treat for us!

Ingredients


1 1/2 cups red wine
3 slices lemon
3 cloves
1/2 cup white sugar
5 cm piece cinnamon bark
6 firm pears

You will require :


 Lemon

Pears

Left :  cinnamon. Right : cloves

Red wine

Instructions


1.  Place wine, lemon slices, cloves, cinnamon and sugar into a saucepan.
2.  When boiling, add peeled pears and simmer for 10 minutes.
3.  Remove pears to a bowl and continue to boil the wine for 10 minutes to reduce the quantity.
4.  Pour hot wine over the pears and allow to stand until warm, turn fruits often.
5.  Serve with ice-cream
6.  Serves 4 to 6 people.

 The ice-cream melted pretty fast in our hot weather

A wine flavoured dessert. 
Unique!


I am linking this post to Cook-Your-Books  # 7

  photo 77951578-1914-4b72-8eda-9e40a91183ac_zps331eb4b4.jpg

Hosted by Joyce of Kitchen Flavours


Wednesday 4 December 2013

Tricolor Fusilli With Ham and Fish Balls

Tricolor Fusilli With Ham and Fish Balls


Recipe source :  Doris Choo

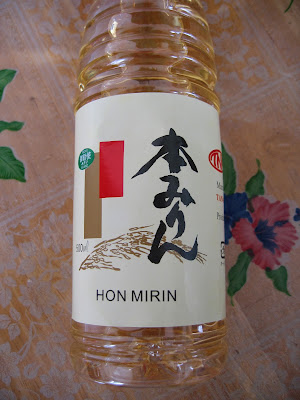
My youngest son loves to eat pasta. I used to cook pasta with either tomato sauce or cheese. But today,  I wanted to cook it differently. Part of the reason was because my fridge was too congested. I needed to finish off  the many bottles of sauces, Japanese mirin and chilli flakes that were taking up space in my fridge. 

Personally, I would have opted for shrimps or seafood for pasta. However, my youngest son prefers ham and bacon. So we comprised by having ham and fish balls, together with some fresh buna shimeji mushrooms and parsley.

Well, I am pleased to share the end result which was delicious!

Ingredients


300g tricolor fusilli
20 pieces fish balls, cut into halves
2 pieces ham, cut into small pieces
150g buna shimeji mushrooms, removed the roots
2 sprig parsley, chopped
4 pips garlic, chopped
1 tsp chilli flakes
2 tbsp oyster sauce
2 tbsp mirin                 (or white wine )
1/4 tsp pepper
1/2 tsp salt
1/2 tsp sesame oil
2 tbsp olive oil

Japanese mirin
 Tricolor fusilli

 Buna shimeji mushrooms

 Fish balls, cut into halves

Ham, cut into small pieces

Instructions


1. Bring a large pot of salted water to a boil over high heat. Add the fusilli and cook until tender but still firm to the bite, stirring occasionally, for about 8 to 11 minutes. Drain pasta reserving 1/2 cup of the cooking liquid. Alternatively , cook accordingly to the instructions mentioned in the package of pasta.
2.  Heat olive oil in a wok and add in chopped garlic and stir-fry until fragrant.
3.  Add in the buna shimeji mushrooms, fish balls and ham. Stir-fry for about 2 minutes.
4.  Add in mirin, oyster sauce, chilli flakes, salt, pepper, and sesame oil. Stir to mix well.
5.  Toss in the boiled fusilli together with 1/2 cup of the cooking liquid from boiling the fusilli.
6.  Continue to stir until the liquid is almost dry, then add in the chopped parsley.
7.  Toss to mix everything until well combined.
8.  Dish up and serve.


Yummy!

Monday 2 December 2013

Cranberry Bread

Cranberry Bread


Recipe source :  Martha Stewart

The other day I bought a packet of fresh cranberries from the supermarket and it is not everyday that you can find fresh cranberries for sale, not even frozen ones. What's available in the supermarkets near my house are only dried and processed cranberries which I have been using to make cakes and cookies.

Little did I know that fresh cranberries tasted so sour and slightly bitter! I did not want to throw them away so I surfed food blogs for recipes that use fresh cranberries. Martha Stewart's cranberry bread caught my attention because her recipe uses the exact amount of fresh cranberries which I bought and partly because the picture in her food blog looked so delicious. 

I was sadly disappointed! Even after baking and with the addition of brown sugar, the cranberries were still sour. But of course it was much better than cranberry in its raw form. However, I am not too accustomed to the sourish taste. But it sure looked pretty, speckled with little red dots all over the bread!


Ingredients


4 tbsp butter, melted, plus more for greasing the loaf tin
2 cups plain flour
1 cup brown sugar
1 1/2 cup baking powder
1/2 baking soda
1 tsp salt                 (I omitted salt because I used salted butter )
1 large egg, beaten
3/4 cup whole milk
12 oz fresh cranberries


Instructions


1.  Preheat oven to 180 degree C. Grease a 9 inch by 5 inch loaf tin.
2.  In a large bowl, whisk together the plain flour, brown sugar, baking powder, baking soda and salt. Set aside.
3.  In a medium bowl, combine melted butter, egg and milk. Mix wet mixture into the dry mixture and whisk to mix until well combined. Fold in the fresh cranberries.
4.  Pour batter into the prepared loaf tin and bake for 1 hour or until done.


Looks beautiful, speckled with red dots all over the bread. 
Note of caution though : The fresh cranberries were sour and slightly bitter.


Related Posts Plugin for WordPress, Blogger...